REVIEW · BRUGES
2-Hour Historical Walking Tour in Bruges with Praline Included
Book on Viator →Operated by Quality Guides · Bookable on Viator
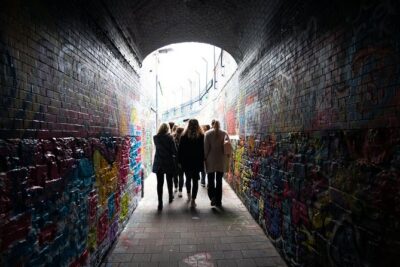
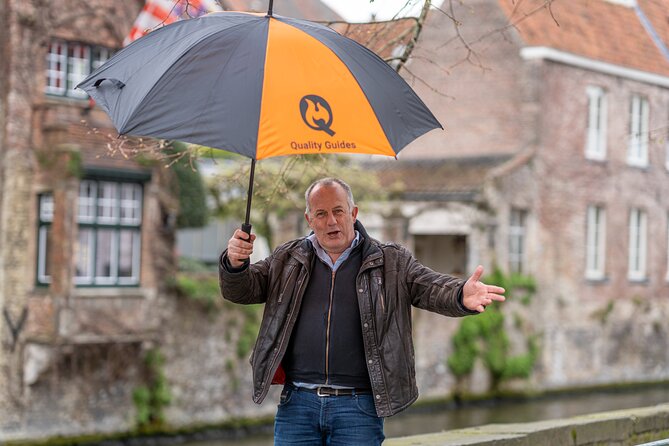
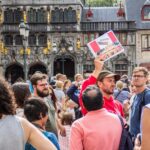
Bruges gets a lot clearer in just two hours. I like that this is a tight, small-group historical walk that hits major squares, canals, and photo viewpoints, then ties it together with practical context. One standout moment is the included praline, linked to how medieval medicine helped inspire the sweet you came for.
What I like even more is the way the guide makes the route feel like a story, not a slideshow. You’ll cover everything from trade and cloth halls to wartime memory and chocolate origins, with stops built around easy walking and quick breaks. The main thing to consider: this tour can feel very tip-focused, so don’t treat the $3.63 price as the whole cost of the experience.
In This Review
- Key things I’d highlight before you go
- Price and logistics: what $3.63 really buys you
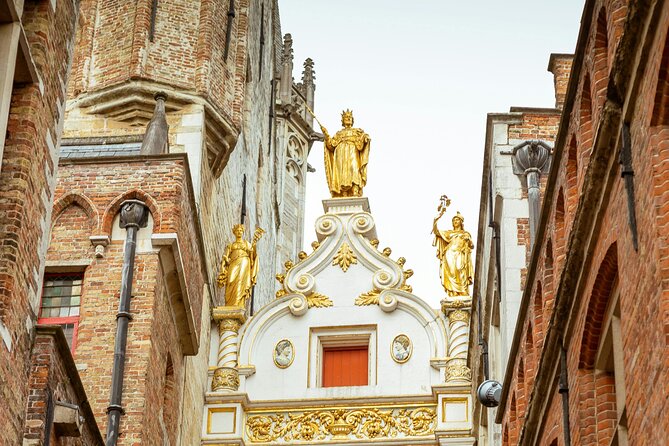
- Getting oriented at Markt 4: the walk starts where power and trade meet
- Burg Square: the starting point for how Bruges built its identity
- The Markt and Belfry area: how medieval trade shaped the skyline
- Belfort and the cloth halls: wealth, pride, and repair work
- Praalboog Pro Patria to Gruuthuse gate: wars, independence, and Gothic details
- Gruuthuse Museum courtyard: Gruut beer and why hops took over
- O.L.V.-kerk Museum: a church stop with standout art (Pietà included)
- Saint John’s Hospital: the medicine-to-pralines connection
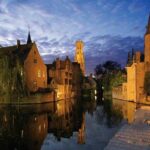
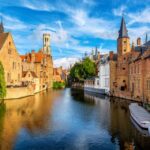
- Sint-Janskaai and the Dijver: water views that give you Bruges in one glance
- Huisbrouwerij De Halve Maan: beer making under the city
- Stoofstraat and Katelijnestraat: the city’s darker lanes and why they matter
- Boniface Bridge: love stories and medieval gardens
- Groeningemuseum and the art hallmarks: the Flemish Primitives spotlight
- Rosary Quay: the Bruges photo that includes nearly everything
- Huidenvettersplein and Vismarkt: food, trade, and the smell of history
- Ending back at Burg Square: town hall, Blood Chapel, and civic closure
- Who should book this tour
- Should you book 2-Hour Historical Walking Tour with Praline Included?
- FAQ
- How long is the Bruges historical walking tour?
- Where does the tour start?
- What language is the tour offered in?
- Is the ticket mobile?
- Is a praline included?
- How big is the group?
- Are rest stops and toilets included?
- What fitness level do I need?
- Are service animals allowed?
- What is the cancellation window?
Key things I’d highlight before you go
- A true highlights loop in 2 hours: squares, churches, bridges, canals, and the big landmarks are grouped for maximum payoff.
- Praline included when shops are open: it’s not just a promise; it depends on availability along the route.
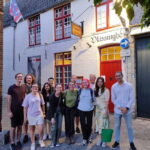
- Max 6 travelers: the group size is small enough to keep the guide easy to hear.
- Local, story-driven guiding: guides like Peter and Joost are praised for humor, pacing, and helpful restaurant ideas.
- Lots of built-in stops: rest stops, drinking water, and public toilets are part of the plan.
- Photo-friendly “Bruges in one shot” viewpoints: Rosary Quay and the water areas are designed for quick pictures.
Price and logistics: what $3.63 really buys you
The headline price looks almost unreal at $3.63 per person, which usually makes you wonder what’s missing. In this case, the value is in the structure: a guided, English-speaking route through some of Bruges’s most recognizable places in about two hours, with a mobile ticket and multiple built-in breaks.
That said, I’d plan for the fact that this is a guide-led, tip-based model. People specifically call out that the guide’s income is tip-based, so if you want the tour to feel like a true bargain, show up ready to tip fairly at the end.
The walking load is light-to-moderate. The tour fits moderate physical fitness, and the route is long enough to feel like you walked, but short enough to keep energy up. Cobblestones and crowded medieval lanes are still a factor, so wear shoes you trust. The best part: you’re not just wandering. You’re moving between planned stops, including breaks for water and toilets.
Also helpful: the tour group is capped at 6 travelers, and it ends back at the meeting point. That makes it simple if you’ve got a later reservation or need to get back to your hotel fast.
You can also read our reviews of more walking tours in Bruges


Getting oriented at Markt 4: the walk starts where power and trade meet

The meeting point is Markt 4, right in the center of Bruges. From minute one, the tour uses the geography to teach you how the city works: squares, civic buildings, and trade hubs sit close together, which makes Bruges feel compact even when the streets twist.
Stop by stop, the guide doesn’t just point. They explain why these places mattered and what changed over time. It’s a smart way to get your bearings fast. If you’re only in Bruges for a day (or you want a solid first pass), this route is built for that.
You’ll also see how the tour uses short, efficient moments. Many stops are around 3 to 10 minutes, which keeps the pace moving and keeps you out of the “stand and listen forever” trap.
Burg Square: the starting point for how Bruges built its identity
You start at Burg Square, presented as the place where Bruges history truly begins. This isn’t a random opening stop. It sets the tone: Bruges is not just pretty canals. It’s civic power, religious influence, and mercantile wealth, all stacked into one small area.
From here, the tour naturally moves you toward the city’s other central hub (the Markt). If you’ve ever visited Bruges and felt like you’re seeing buildings without understanding the city’s logic, this first stretch fixes that.
A small consideration: this is a quick introduction. If you love lingering for 30 minutes per landmark, you might feel a little impatient. The trade-off is you’ll cover a lot more territory overall.
The Markt and Belfry area: how medieval trade shaped the skyline

Next up is The Markt, with the Belfry and the surrounding water halls and cloth halls. The tour frames this as the medieval engine room: money moved, cloth was processed and sold, and the city’s wealth was made visible in stone.
A few stops later, you’ll learn more about the Belfry’s origins and its current problems. That structure matters because it explains why the Belfry looks the way it does and why it became such a symbol of Bruges.
What I like here is the mix of “what you’re seeing” and “why it looks that way.” If you’re the type who takes photos but also wants captions in your head, this section does the job.
Belfort and the cloth halls: wealth, pride, and repair work
At Belfort, the guide shares the Belfry’s backstory and talks about the challenges it faces now. They connect it to the wealth created by the cloth halls, so you understand this isn’t just a tall tower. It’s tied to the city’s trading power and status.
In practical terms, this stop helps you read the rest of the city. When you later see other medieval buildings, you’ll know what categories to put them into: trade, civic life, guild influence, and religious authority.
Time here is short (about 5 minutes), so don’t expect a museum-style lecture. Expect a clear explanation plus a few memorable details you can carry into the rest of your Bruges day.
You can also read our reviews of more historical tours in Bruges


Praalboog Pro Patria to Gruuthuse gate: wars, independence, and Gothic details

Then the tour pivots into more 20th-century meaning and national identity with Praalboog Pro Patria, tied to Bruges in the First and Second World Wars and Belgium’s independence.
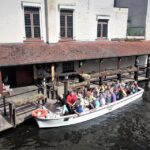
From there, you head to the Beschermcomité Gruuthuse area. This is where the tour slows just enough to appreciate the Gothic gate of Gruuthuse, plus it points out connections to canal tours offered by companies nearby. Even if you’re not booking a canal cruise on the same day, you’ll understand why the canals matter so much here.
This section is one of the more “story turns,” where Bruges stops being only medieval. It becomes a city that lived through modern history too.
Gruuthuse Museum courtyard: Gruut beer and why hops took over
At Gruuthusemuseum, you’re told the “beer story.” You stand in the courtyard of a Gothic castle and learn how the resident became wealthy with Gruut, and why the city eventually switched from Gruut to hops.
That’s a fun stop for two reasons:
- It’s not another lecture about art alone.
- It shows how food and industry shaped wealth, not just kings and churches.
This is also where you’ll feel the tour’s overall style: short stops, clear context, and just enough color to make the details stick.
O.L.V.-kerk Museum: a church stop with standout art (Pietà included)
Next is O.L.V.-kerk Museum, the church stop with the Pietà and other priceless artworks. This isn’t framed as a deep art history seminar. It’s a chance to see why Bruges earned its reputation for devotional art and why churches were also cultural power centers.
If you like stepping into a building and getting the key highlights without losing an entire afternoon, this is your sweet spot. Expect a quick overview (around 5 minutes), then you move on.
Saint John’s Hospital: the medicine-to-pralines connection
One of the most memorable parts of the route is Saint John’s Hospital, where the guide explains how medieval medicine is linked to the creation of pralines.
This matters because the praline isn’t treated like a random sweet. You get the narrative thread: medicine, care, and food traditions running together in early Bruges. Then the included praline makes more sense when you taste it.
Timing is about 10 minutes, so it’s enough to connect the dots, especially if you’ve got chocolate on your mind and want the story behind it.
Important note: the tour includes a praline crafted by the Guild of Bruges Chocolatiers, but it’s only available if the respective shop is open. If you’re visiting during a period when some shops close early, this is the one element you can’t ignore.
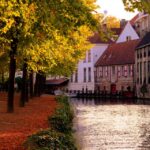
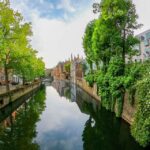
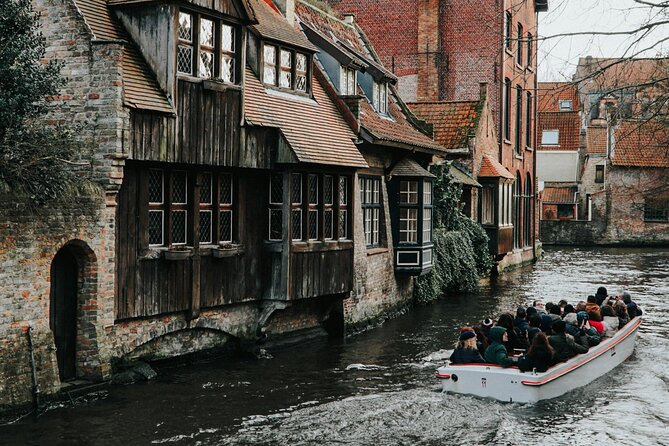
Sint-Janskaai and the Dijver: water views that give you Bruges in one glance
After the hospital story, you hit the water. At Sint-Janskaai, you’ll stop by the canal and get a photo moment with a medieval backdrop.
Then comes the Dijver, described as the oldest port of Bruges. You get a Vikings-and-looting angle for how goods were loaded for transport, plus a view of one of Bruges’s famous terraces. This is one of those stops that feels like it explains why Bruges became rich in the first place.
If you love photos, don’t rush this part. The tour gives you a planned window to frame the city with water in the background.
Huisbrouwerij De Halve Maan: beer making under the city
At Huisbrouwerij De Halve Maan, the tour points out Walplein and the famous brewery that has a pipeline under the city. This is a small detail, but it’s the kind that makes Bruges feel real: the medieval streets aren’t frozen in time. They still carry infrastructure for modern life.
Even though this is a quick stop (about 5 minutes), it gives you something tangible: Bruges didn’t just preserve the past. It kept operating.
Stoofstraat and Katelijnestraat: the city’s darker lanes and why they matter
Stoofstraat is framed as the medieval red light district, plus the tour talks about customs tied to that area. It’s also where you hear about the darker side of the swans. It’s a quick and honest pivot to the parts of Bruges that weren’t polite and tidy.
Then Katelijnestraat covers a mashup: chocolate, waffles, and fries. The guide also brings in Bruges’s “dark days,” including the plague. This is one of those stops where you’ll likely want to look around and realize how everyday food culture can come out of desperate times.
These aren’t long stops (around 5 to 10 minutes each), so don’t expect a historical lecture. Expect a quick context layer that helps you stop seeing Bruges as only postcard scenes.
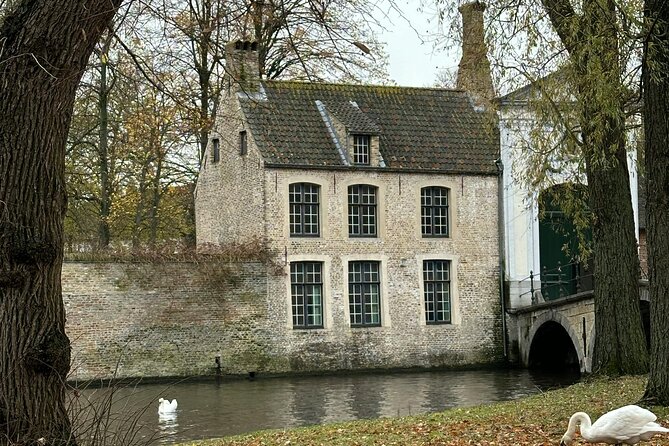
Boniface Bridge: love stories and medieval gardens
At Boniface Bridge, the tour calls it the ultimate bridge of love, but also notes some more dubious sides. You also get a look toward the medieval gardens of Bruges.
Time is about 10 minutes, which makes it ideal for a slow walk-by and a couple of photos. It’s also a nice break in pacing before you head to the museum area and then back toward the big finale squares.
Groeningemuseum and the art hallmarks: the Flemish Primitives spotlight
Next is Groeningemuseum, where the tour points out Flemish Primitives like Jan van Eyck and Hans Memling, plus Hugo van der Goes and Gerard David. The idea is to remind you that Bruges’s art reputation is global, not local trivia.
This stop is short, about 5 minutes. But it gives you a meaningful reference point if you’re planning to return later for deeper museum time.
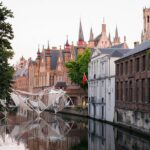
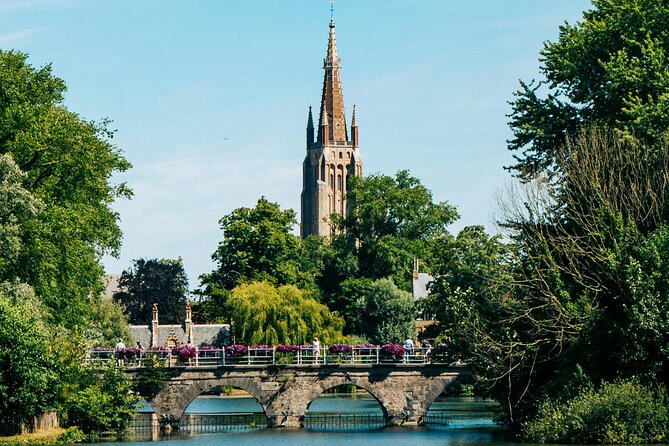
Rosary Quay: the Bruges photo that includes nearly everything
Now for the big viewpoint. At Rosary Quay, the guide gives you the stop for the photo of Bruges: the Belfry and the Church of Our Lady in one shot, plus the hotel from the film In Bruges tied to the guide’s local trivia.
This is around 5 minutes, so treat it like a photo window rather than a long stop. If you’re serious about pictures, plan to be ready when your guide pauses you here.
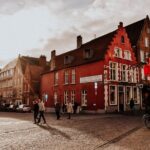
Huidenvettersplein and Vismarkt: food, trade, and the smell of history
Then you pass through Huidenvettersplein, where tanners of the Middle Ages are the theme. The tour doesn’t sugarcoat it: it was likely one of the most foul-smelling squares in Bruges, and the guide explains the tanners and the working reality behind the historic buildings.
Today, it’s a spot to satisfy hunger and thirst. That’s a smart way to end the “darkness” theme with something more everyday.
After that comes Vismarkt, framed as two fish markets for two types of people, with a mix of Gothic, Renaissance, and Classicist styles. Even if you’re not an architecture fan, it’s a satisfying last “look around” moment before you finish at the civic core.
Ending back at Burg Square: town hall, Blood Chapel, and civic closure
The tour finishes back at Burg Square for the town hall, the Blood Chapel, and the courthouse areas—bringing together the civic styles of the city with “strong true stories.”
This finale works because it circles back to where you began. If you’ve been feeling like you saw a lot but didn’t connect it, the ending helps lock in the narrative: Bruges was built by trade, governed through civic power, and shaped by religion and events that left marks.
Who should book this tour
I think this is a great pick for you if:
- you want a first-time Bruges overview without spending your whole day in transit between far-flung sights
- you care about stories that connect buildings, food, and history
- you want a guide who adds humor and keeps the pace comfortable (people highlight guides like Peter and Joost for that)
- you’re traveling with adults or kids old enough to handle a steady walk and short stops
It might be less ideal if:
- you hate walking on uneven cobblestones
- you want long museum time at every stop rather than quick, high-impact introductions
- you strongly dislike tours where tipping is expected on top of the listed price
Should you book 2-Hour Historical Walking Tour with Praline Included?
Yes, if your goal is a smooth, high-value “Bruges orientation plus key stories” session. The combination of central landmarks, photo-ready water stops, and the praline tied to the Saint John’s Hospital story makes it more than just a highlight walk. Add the max 6 travelers setup and the guides’ reputation for humor and pacing, and it’s a very easy tour to recommend.
Before you book, do two practical things:
- plan a tip budget for the guide
- be ready that your praline depends on whether the shop is actually open when you reach it
If you want one small, efficient way to understand Bruges fast, this is one of the better bets.
FAQ
How long is the Bruges historical walking tour?
It lasts about 2 hours.
Where does the tour start?
The meeting point is Markt 4, 8000 Brugge, Belgium.
What language is the tour offered in?
The tour is offered in English.
Is the ticket mobile?
Yes. The tour uses a mobile ticket.
Is a praline included?
Yes, a praline crafted by the Guild of Bruges Chocolatiers is included. Availability depends on whether the relevant shop is open.
How big is the group?
The tour has a maximum of 6 travelers.
Are rest stops and toilets included?
Yes. The plan includes rest stops, drinking water, and public toilets.
What fitness level do I need?
The tour recommends moderate physical fitness level.
Are service animals allowed?
Yes, service animals are allowed.
What is the cancellation window?
You can cancel for a full refund if you cancel at least 24 hours before the experience’s start time, based on local time.