REVIEW · BRUGES
💛 Tell Me About Bruges 🏰 1000 Years of Stories by Locals ⭐
Book on GetYourGuide →Operated by Ambassadors Tours & Activities · Bookable on GetYourGuide
Bruges has a way of feeling old fast. This walking tour makes that happen on purpose, using local storytellers to connect major medieval landmarks with the real people who lived, argued, and traded here. In about two hours, you’ll get a clear picture of Bruges from its Golden Ages to the stretch where it lost ground, then bounced back.
Two things I especially like: you’re not stuck in dates-and-dukes mode, because the guides treat the past like a story you can follow. And you get practical payoff too, with tips, recommendations, and discounts that help you eat and drink your way through the rest of your trip.
One consideration: it’s a walking tour through the medieval center, so if you’re tired of crowds or you’re sensitive to cold weather, you’ll want to dress for the outdoors and plan some slower time right after.
In This Review
- Key highlights worth planning around
- Why this Bruges walking tour feels different than a standard history stroll
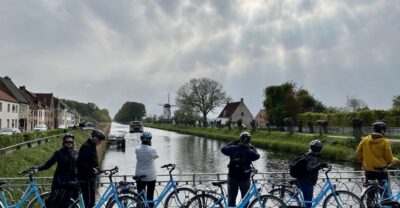
- Meeting on Market Square: the yellow umbrella plan
- Start with the Markt: where power and business talk loudly
- Pieter de Coninck en Jan Breydel and the political pulse
- Provincial Court and the Civic Map in your head
- Belfry of Bruges: the vertical landmark that holds the city together
- The beer stop that isn’t just a detour
- Burg Square and Bruges City Hall: where the city performs itself
- Blinde-Ezelstraat and the city’s character in small doses
- Vismarkt fish market area: trade you can imagine
- Huidenvettersplein and the work behind the beauty
- Rozenhoedkaai: the postcard view with a story attached
- Dijver and the slow-water feeling that makes Bruges work
- St. Boniface Bridge (Bridge of Love): the romantic stop with teeth
- Gruuthusemuseum area: culture and wealth in one name
- Church of Our Lady: when faith meets art and civic pride
- Oud Sint-Jan site: St. John’s Hospital and the human side
- Walplein Square and the path to the finish
- Halve Maan brewery photo stop: Bruges keeps giving you food culture
- Finish at Huisbrouwerij De Halve Maan: end where the city tastes alive
- What the guides do that makes the whole tour work
- Price and value: why a low-cost free tour can be a smart buy
- Who should book this tour
- Quick do-this-now tips before you go
- FAQ
- FAQ
- How long is the Bruges walking tour?
- Is the tour free?
- Where do I meet the guide?
- What language is the tour in?
- What can I see during the walk?
- Is the tour wheelchair accessible?
- Are large groups allowed?
- Should you book this Bruges tour?
Key highlights worth planning around
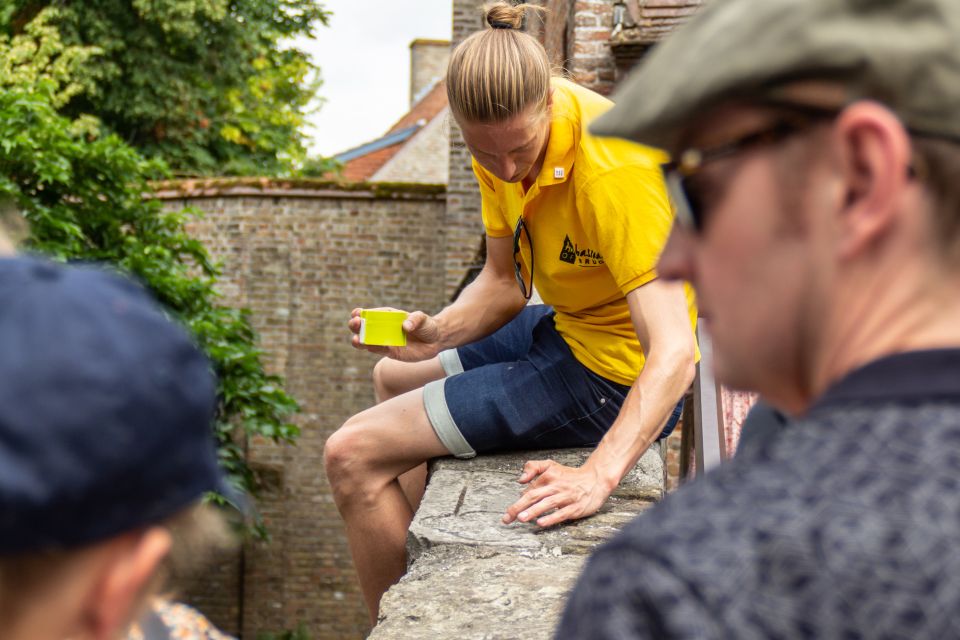
- Small-group feel: a maximum of 6 people per booking keeps the tour lively and easier to hear.
- Meet at the Belfry area: look for the guide with the yellow Ambassadors umbrella on Market Square.
- Bridge of Love photo stop: the St. Boniface Bridge viewpoint is one of the best quick “wow” moments in town.
- Beer and chocolate show up: expect stories (and frequent mentions) tied to local food and drink culture.
- A guided pass through the postcard route: Rozenhoedkaai, the Fish Market area, and the Church of Our Lady are all part of the arc.
- Guides with stage energy: many guides lean into humor and performance, with examples like Pascal’s umbrella theatrics and Gosha’s big laughs.
Why this Bruges walking tour feels different than a standard history stroll

Bruges can be charming in a postcard way, but it can also feel like a set of pretty buildings if you don’t have a guide who explains what made it tick. This tour is built around the idea that medieval life was messy, funny, political, and personal. You’ll hear how the city got rich, why it later faded into poverty, and what it did to start flourishing again.
What makes it click is the rhythm. You start in the political and mercantile heart of the city, then move through the spots where money, work, faith, and love all left their marks. Even when the facts are serious, the guide’s job is to keep you moving and thinking in human terms.
And yes, it’s a free walking tour in the classic sense: you’re expected to tip your storyteller at the end. But don’t confuse that with “low effort.” The tour is designed like a performance with a clear storyline, and the ratings reflect that.
You can also read our reviews of more tours and experiences in Bruges.


Meeting on Market Square: the yellow umbrella plan
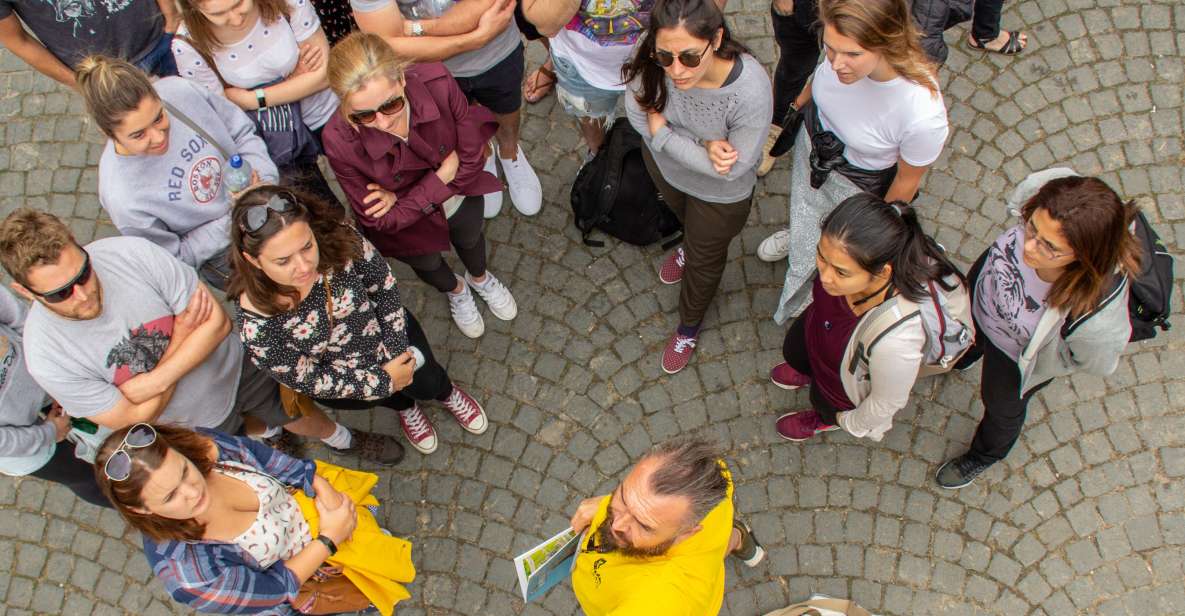
Your meeting point is practical: find the guide with the yellow umbrella that says Ambassadors in front of the Belfry Tower on Market Square (Markt).
That matters more than you’d think. Bruges is easy to navigate visually, but meeting points can be chaotic when multiple tours overlap. Starting at the Belfry area puts you in the right place to get oriented fast, and it keeps the first stretch simple.
The tour ends back near the meeting point, which is handy because you can keep exploring without scrambling for transit.
Start with the Markt: where power and business talk loudly

The tour kicks off on Markt, Bruges’ main square. This is where you feel the city’s “public face” and where medieval civic life played out. From here, the guide sets up the big theme: why Bruges became so wealthy in its early Golden Ages, and what that wealth did to the city’s buildings, institutions, and social expectations.
If you only see Bruges from canals and facades, you miss the muscle. Starting at the Markt fixes that. You’ll get a framework for the rest of the walk, so later stops won’t feel like random highlights.
Pieter de Coninck en Jan Breydel and the political pulse
Next you’ll pass the area tied to Pieter de Coninck en Jan Breydel, which helps you connect Bruges to medieval civic identity. The guide uses these references to explain how local conflict and civic pride shaped the city. It’s the kind of stop that can look small and easy to skip on your own, but in a story-driven tour it becomes a turning point.
A plus here: even if your history background is thin, the guide keeps it understandable by tying it to what you can see and what it meant for daily life.
Provincial Court and the Civic Map in your head
You’ll also make time at the Provincial Court area. The guide uses this stretch to connect governance, trade, and wealth. This is where you’ll start to notice patterns: who held power, what institutions looked like, and how wealth showed up in the way the city organized itself.
The only downside is that a few stops here are short exterior looks. If you love deep museum-style detail, you’ll still get the story, but you won’t be in “sit down and read panels all afternoon” mode.


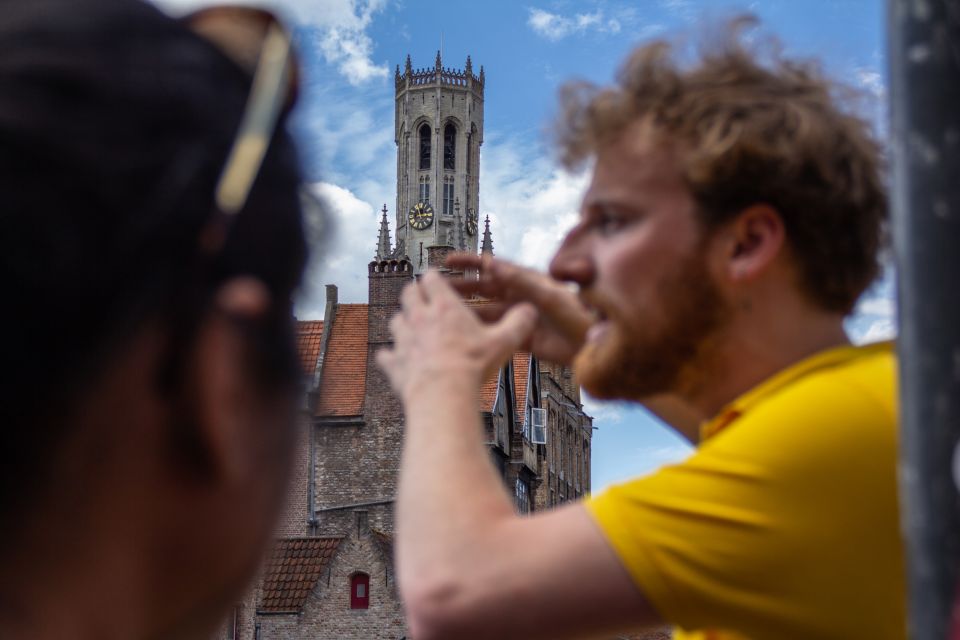
Belfry of Bruges: the vertical landmark that holds the city together
The Belfry of Bruges is one of the most important symbols in the medieval city—your guide brings that symbolism to life. You’ll spend time here early enough that it clicks as you walk.
Why this stop matters: belfries weren’t just pretty towers. They were tied to civic authority and community identity. Even without museum entry, the guide helps you understand what it represented when Bruges was at its richest.
The beer stop that isn’t just a detour

Right after the tower area, the walk includes a short stop at the Bruges Beer Experience area. This isn’t marketed as a beer tasting within the tour details you’ll receive, but the guide uses the spot (and the city’s brewing culture) to talk about Bruges as a place where everyday pleasure mattered, not only official history.
In practical terms, it’s a breather in the walking flow—short enough to keep momentum, but placed often enough that you start thinking like a visitor who plans around snacks.
Burg Square and Bruges City Hall: where the city performs itself

Burg Square is where the mood shifts toward the civic and ceremonial. You’ll also get time at Bruges City Hall.
This part of the walk is good if you like architecture, but it’s more than photo ops. The guide ties these buildings to money and governance, so you’re not just looking at ornate stonework—you’re learning why it was built, who it served, and how it reflected social priorities.
A quick consideration: since Burg Square is a center-of-gravity area, it can be busy. Still, the guide’s pacing helps you avoid feeling stuck in one spot for too long.
Blinde-Ezelstraat and the city’s character in small doses
Walking through Blinde-Ezelstraat gives you a more human scale of Bruges—narrow street energy rather than open squares. These steps help you picture how people moved through the medieval core and why the city’s layout supported its economy.
This is also where humor comes in. Many guides use local quirks and colorful stories to keep the walk from turning into a lecture.
Vismarkt fish market area: trade you can imagine
You’ll pass through the Fish Market area (Vismarkt). It’s a classic medieval trade setting, and the guide uses it to talk about the city’s commercial life. Even if you don’t stop to eat here, it gives you a mental map of where food culture began long before modern restaurants existed.
For me, this stop is one of the easiest ways to connect history to smell, sound, and daily routines—even when you’re just moving through streets.
Huidenvettersplein and the work behind the beauty
Huidenvettersplein is another place where the guide can connect “industry” to “architecture.” The medieval city’s wealth didn’t come from monuments alone; it came from people doing jobs, making goods, and building systems that kept money circulating.
If you’re the type of traveler who wants a reason behind every pretty building, this is where you start getting that satisfaction.
Rozenhoedkaai: the postcard view with a story attached
Then you hit Rozenhoedkaai, and you’ll get a photo stop and guided context. This viewpoint is one of the most photographed views in Bruges for a reason: the canals and facades create a neat, readable picture of medieval waterways and the city’s relationship to commerce.
What I like here is that it’s not just a “stand here and take a picture” moment. The guide connects the view to how the city functioned, so you’re not saving this stop only for Instagram—you understand why the scene looks the way it does.
Dijver and the slow-water feeling that makes Bruges work
You’ll walk by Dijver, and the guide keeps the story going while you transition from “square and tower” Bruges into “canal and reflection” Bruges.
This is a good stretch if you like calm. It gives you time to slow down mentally without losing the tour’s momentum.
St. Boniface Bridge (Bridge of Love): the romantic stop with teeth
A major photo stop comes at Bonifacius Bridge, often nicknamed the Bridge of Love (St. Boniface Bridge). The guide ties this into larger themes—love, conflict, and public life in medieval Bruges.
This is also a great place to test whether the guide’s style works for you. If you like humor and story performance, you’ll feel it here because the bridge becomes a scene instead of just a landmark.
Gruuthusemuseum area: culture and wealth in one name
You’ll pass through the Gruuthusemuseum area. Even without museum admission, the guide’s explanation helps you understand why the name matters—this is where wealth and cultural identity show up in Bruges’ story.
It’s a good reminder that Bruges is a city where private power and public culture got tangled over centuries.
Church of Our Lady: when faith meets art and civic pride
The Church of Our Lady is another key stop, with guided context. You’ll spend enough time to see why this site mattered, not only as a place of worship but as part of the city’s identity.
The guide helps you understand what you’re looking at from street level, so even if you don’t go inside, you’ll leave with a better sense of the building’s role.
Oud Sint-Jan site: St. John’s Hospital and the human side
Next comes the site Oud Sint-Jan, Bruges’ St. John’s Hospital area. This is where the tour becomes more grounded. Instead of only celebrating wealth and civic pride, you get a look at how medieval Bruges handled care, community needs, and social responsibility.
It’s one of the best sections for travelers who like history that feels connected to real people, not only kings and battles.
Walplein Square and the path to the finish
Walplein Square comes next, with a short guided stop. This part helps you connect the dots in the city’s walking flow and keeps your orientation sharp as you near the end.
If you’re hoping the tour will help you navigate the rest of Bruges after, this segment is useful. It keeps the walk from feeling like you’re only sightseeing and then leaving.
Halve Maan brewery photo stop: Bruges keeps giving you food culture
You’ll make a photo stop near Halve Maan brewery. The guide connects the city’s brewing identity to the broader themes you’ve been hearing all along—trade, daily life, and what people valued.
This is a smart inclusion for two reasons. First, it matches the “Belgian food and drink” reality of the trip. Second, it gives you a stop that feels like it belongs in the modern Bruges story too, not only the medieval one.
Finish at Huisbrouwerij De Halve Maan: end where the city tastes alive
The walk finishes at Huisbrouwerij De Halve Maan. Even if you don’t plan on admission, you’ll end in a place that feels like Bruges in motion, where tradition and modern visitors meet.
And because the tour ends back near the starting area, you can immediately pivot to your own plans: dinner, a canal stroll, or just lingering longer in the areas you enjoyed most.
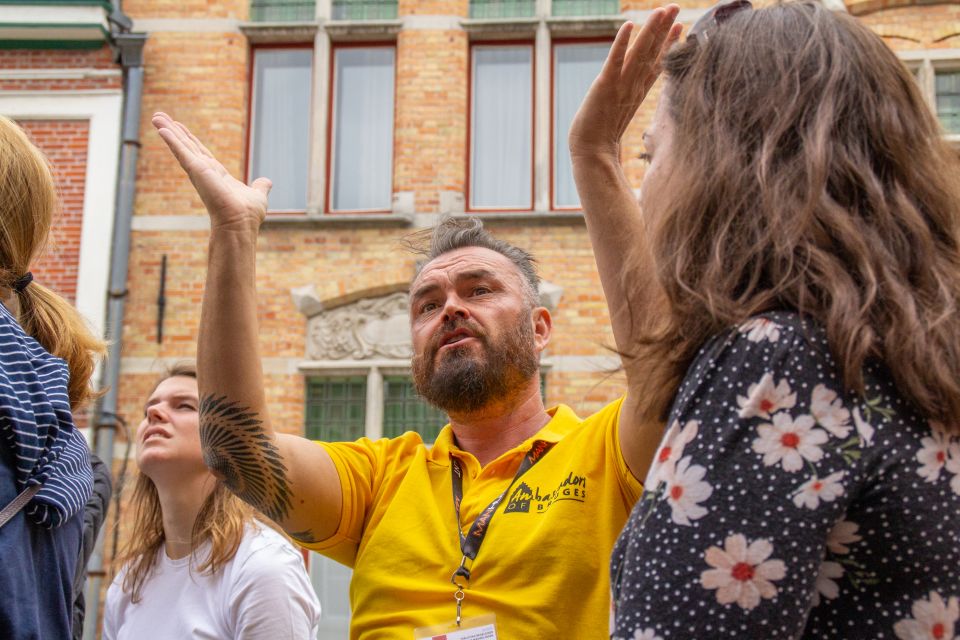
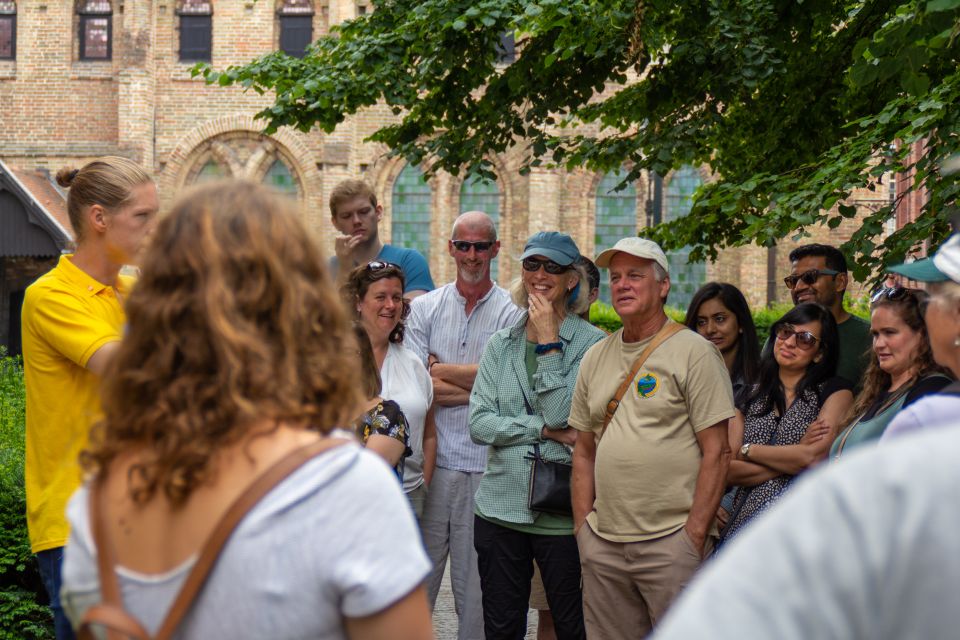
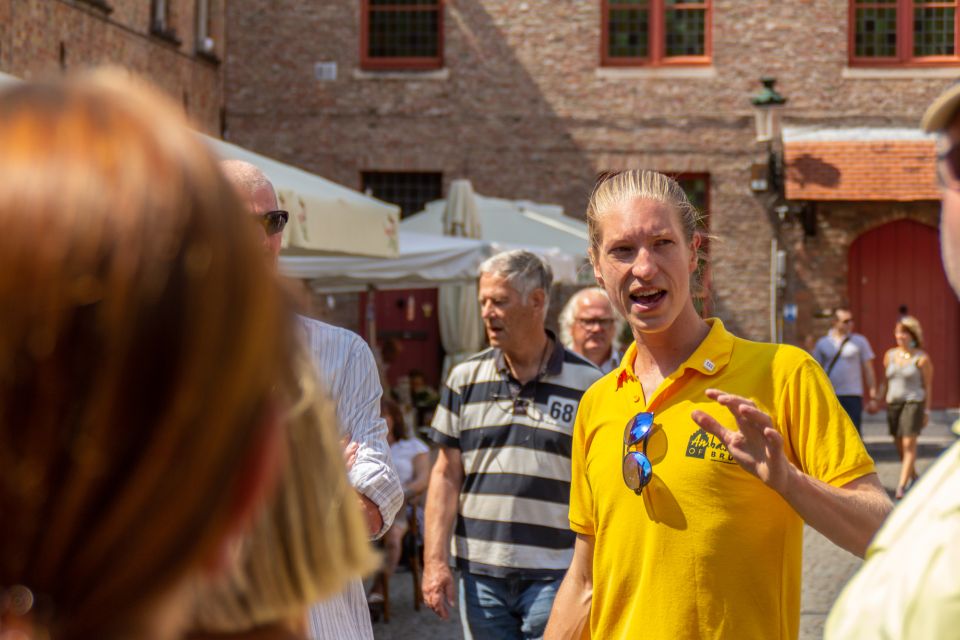
What the guides do that makes the whole tour work
The biggest strength of this experience is the storytellers. Across the guide styles, the through-line is performance with purpose: humor, character, and a clear timeline that doesn’t get lost in facts.
You’ll hear names like Pascal, Gosha, Steve, Ray, Nikki, Arthur, Andy, Nick, and Sophie in the guide mix. Many descriptions emphasize an energetic, theatrical approach—things like umbrella sword-fighting bits and playful character acting are part of the vibe you may experience depending on who leads your group.
That’s why this tour doesn’t feel like a formal lecture. You’re getting history as something you can picture.
Price and value: why a low-cost free tour can be a smart buy
The listed price is $3.41 per person, but the experience is fundamentally a free walking tour concept where you tip the guide. That pricing structure usually means you’re paying for the guide’s time through your tip rather than buying an expensive ticket to museums.
For value, I’d look at three things:
- Two hours of guided orientation. If you’re doing a first-time Bruges visit, saving effort on figuring out what matters is worth a lot.
- Story-driven context. You get the “why” behind landmarks, not only what they look like.
- Local recommendations and discounts. Even small discounts can add up when you’re deciding where to eat and drink.
If you love history but get bored by lectures, this is one of the better ways to spend a morning or afternoon hour without locking into costly attractions.
Who should book this tour
This is a strong pick if you:
- want your first Bruges day to feel organized and meaningful
- like humor mixed with history
- want a quick survey of key medieval landmarks without paying museum prices
- enjoy walking at an easy-to-moderate pace through the center
It’s also a good choice for couples and solo travelers because you’ll still feel the tour is about your understanding, not about waiting for a big group.
Quick do-this-now tips before you go
- Wear shoes you trust for cobblestones. You’ll be walking between multiple key areas.
- Bring a jacket. Even when the schedule sounds simple on paper, Bruges weather can turn on you.
- If you care about specific themes like finance, feminism, or the city’s political shifts, ask your guide at the end where to follow up next. The tour includes tips and recommendations, and it’s worth using them while you’re fresh.
FAQ
FAQ
How long is the Bruges walking tour?
The tour runs for about 2 hours.
Is the tour free?
It’s a free walking tour concept. You tip your local storyteller at the end.
Where do I meet the guide?
Meet in front of the Belfry Tower on Market Square (Markt). Look for the guide holding a yellow umbrella with Ambassadors on it.
What language is the tour in?
The tour is in English.
What can I see during the walk?
You’ll pass key medieval sights such as Markt, the Belfry, Burg Square and City Hall, Rozenhoedkaai, Bonifacius Bridge (Bridge of Love), the Church of Our Lady, the St. John’s Hospital area (Oud Sint-Jan), and a photo stop near Halve Maan brewery.
Is the tour wheelchair accessible?
Yes, it is wheelchair accessible.
Are large groups allowed?
No. A maximum of 6 people per group can book for this tour. Larger groups must contact Ambassadors Tours directly for a private tour, and groups over 6 will be rejected on the spot.
Should you book this Bruges tour?
Yes, if you want a tour that gives you a real sense of Bruges instead of just a list of sites. The combination that sells it for me is simple: two hours, local storytelling, and a route that hits the postcard landmarks while also explaining the city’s swings between wealth, conflict, and later recovery.
If you’re the kind of traveler who loves history but hates boring delivery, this one fits. And if you’re on a budget, the free walking tour model plus local recommendations can be a smart use of your time.
Only skip it if you strongly dislike guided walking tours or you know you won’t tolerate crowds in a central square-and-canal route. Otherwise, this is a very solid way to start understanding Bruges fast.